
Tangent Element in Baselight
This quick walk-through describes the functionality and mapping of the Tangent Element panel in Baselight, going from the most useful to the least interesting modules.
Bt - Button
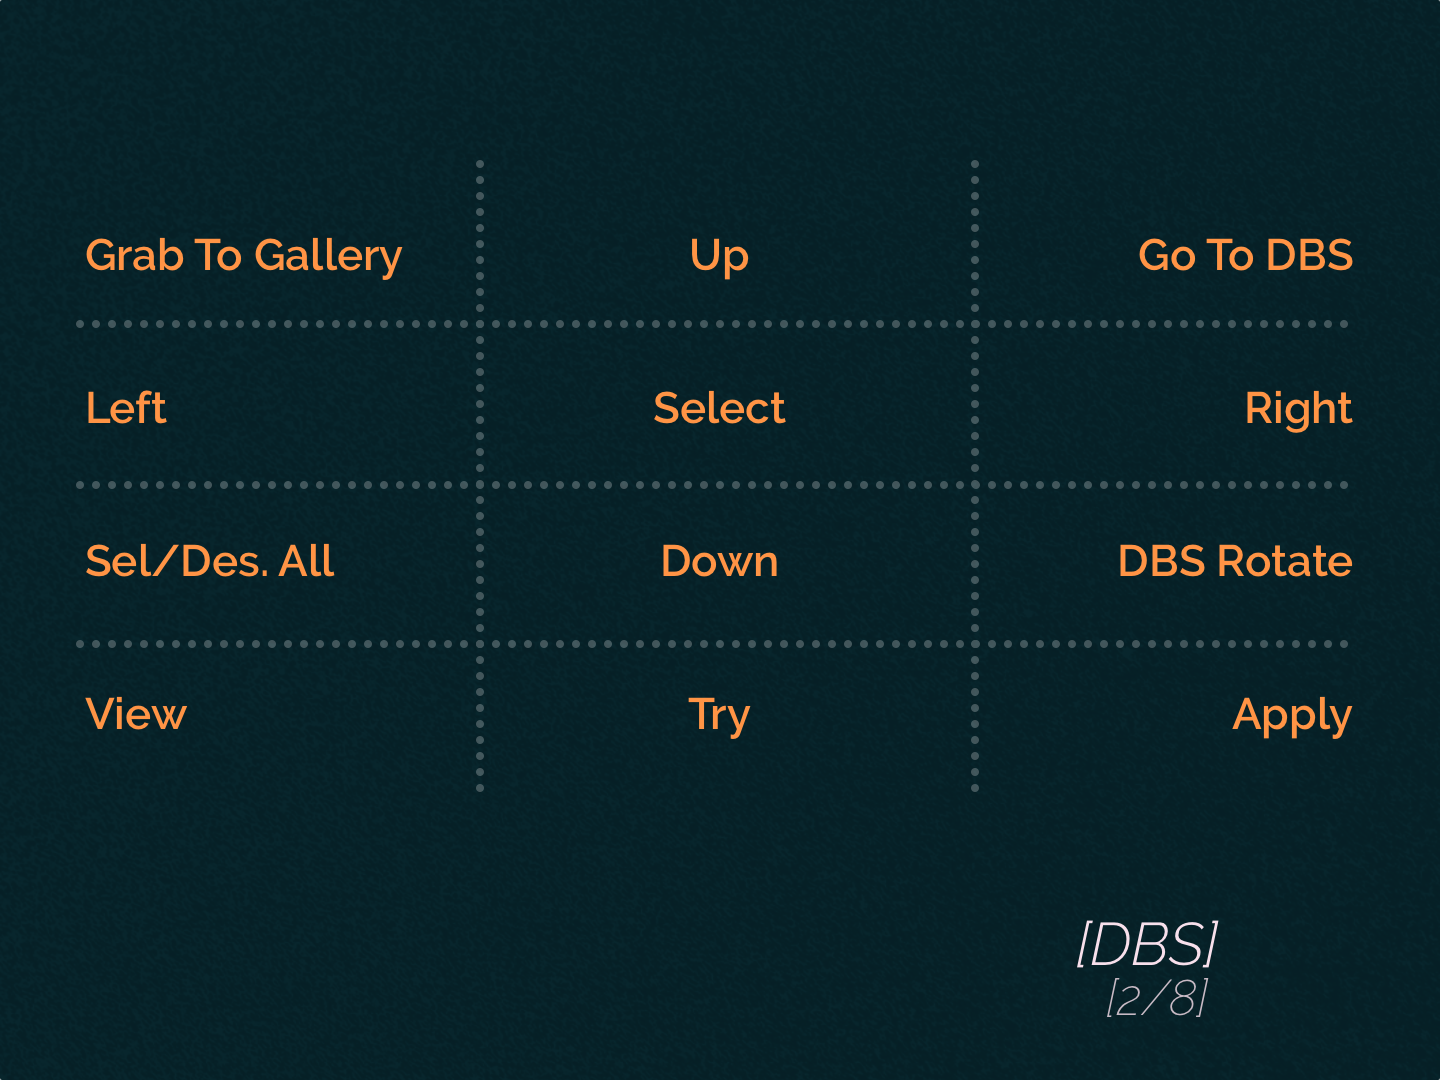
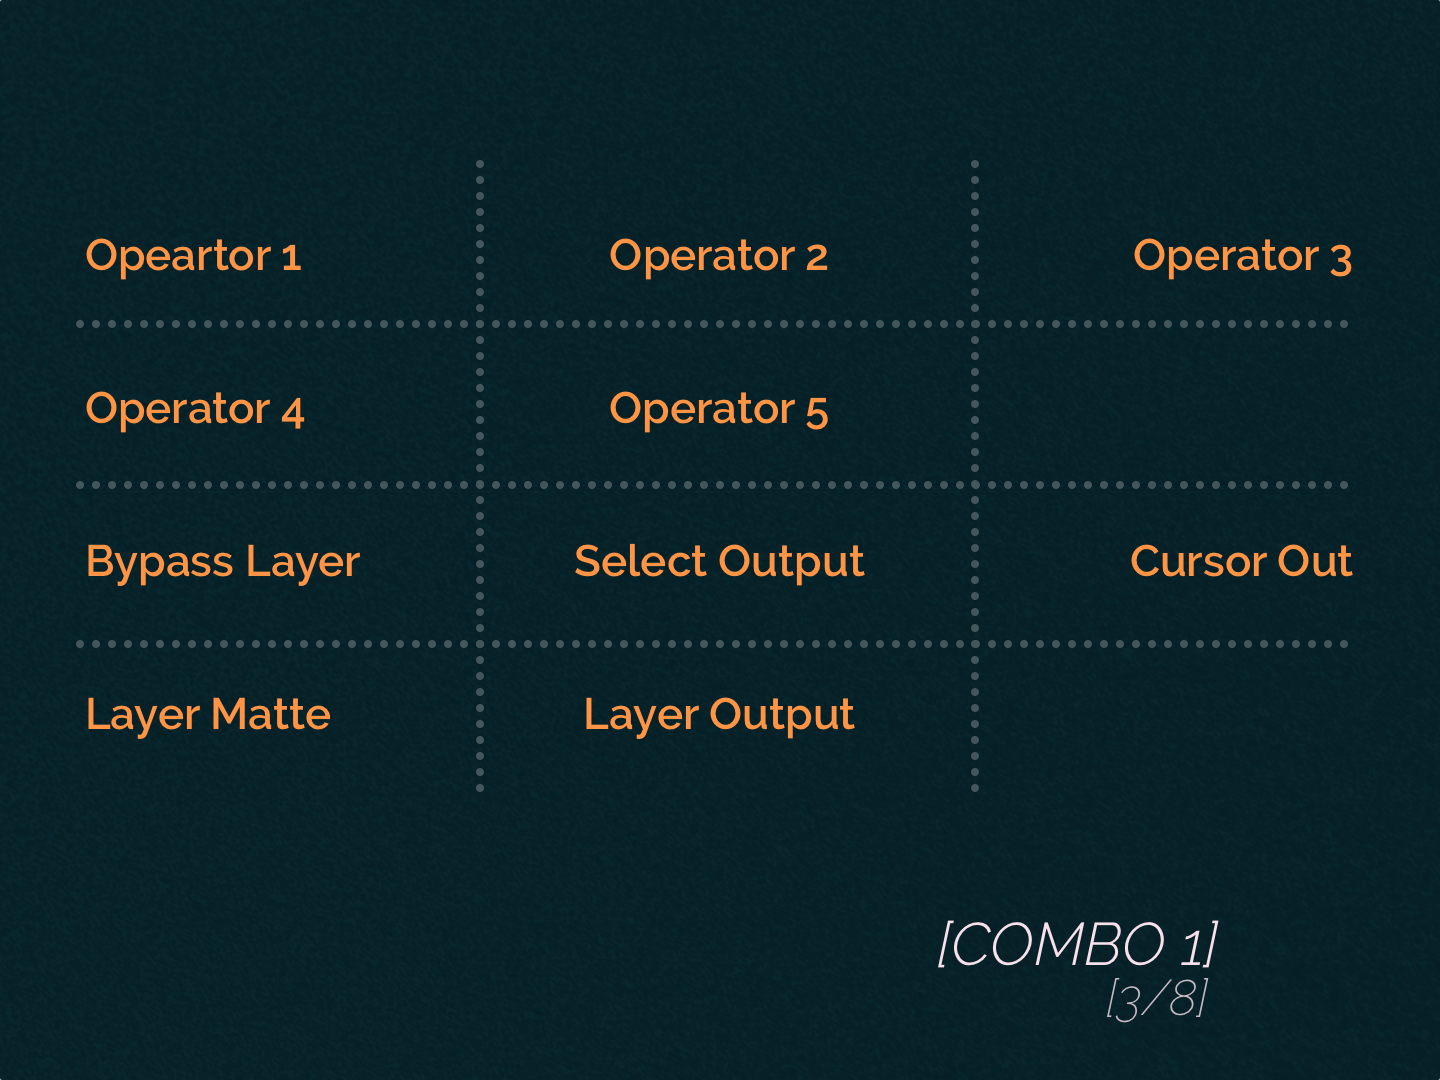
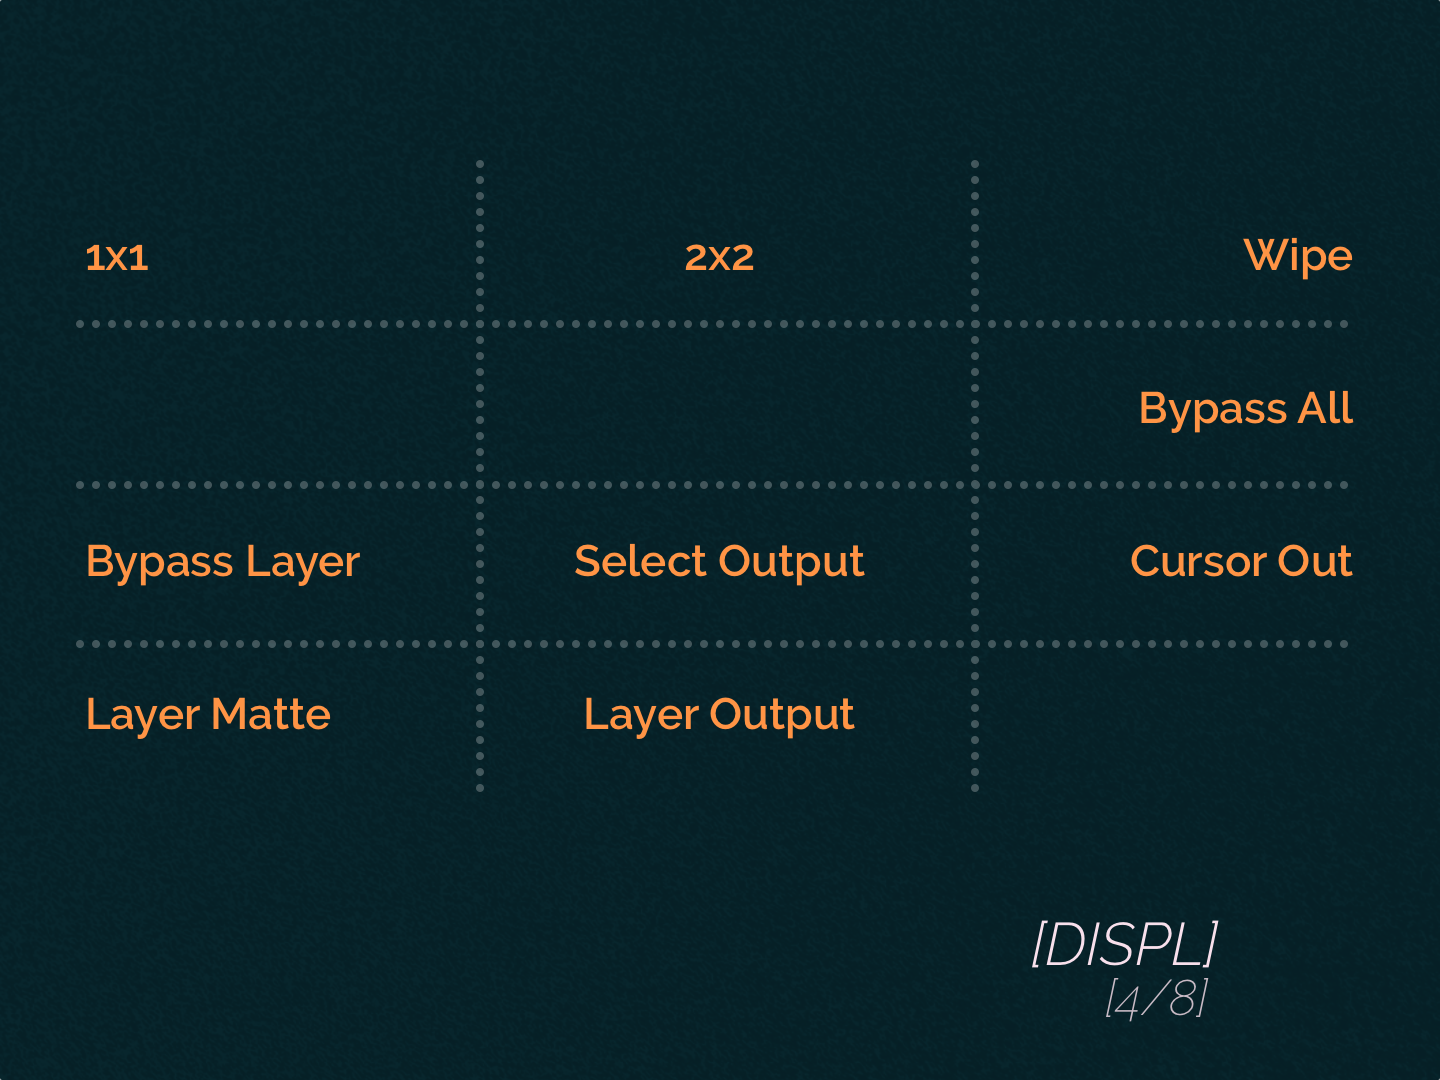
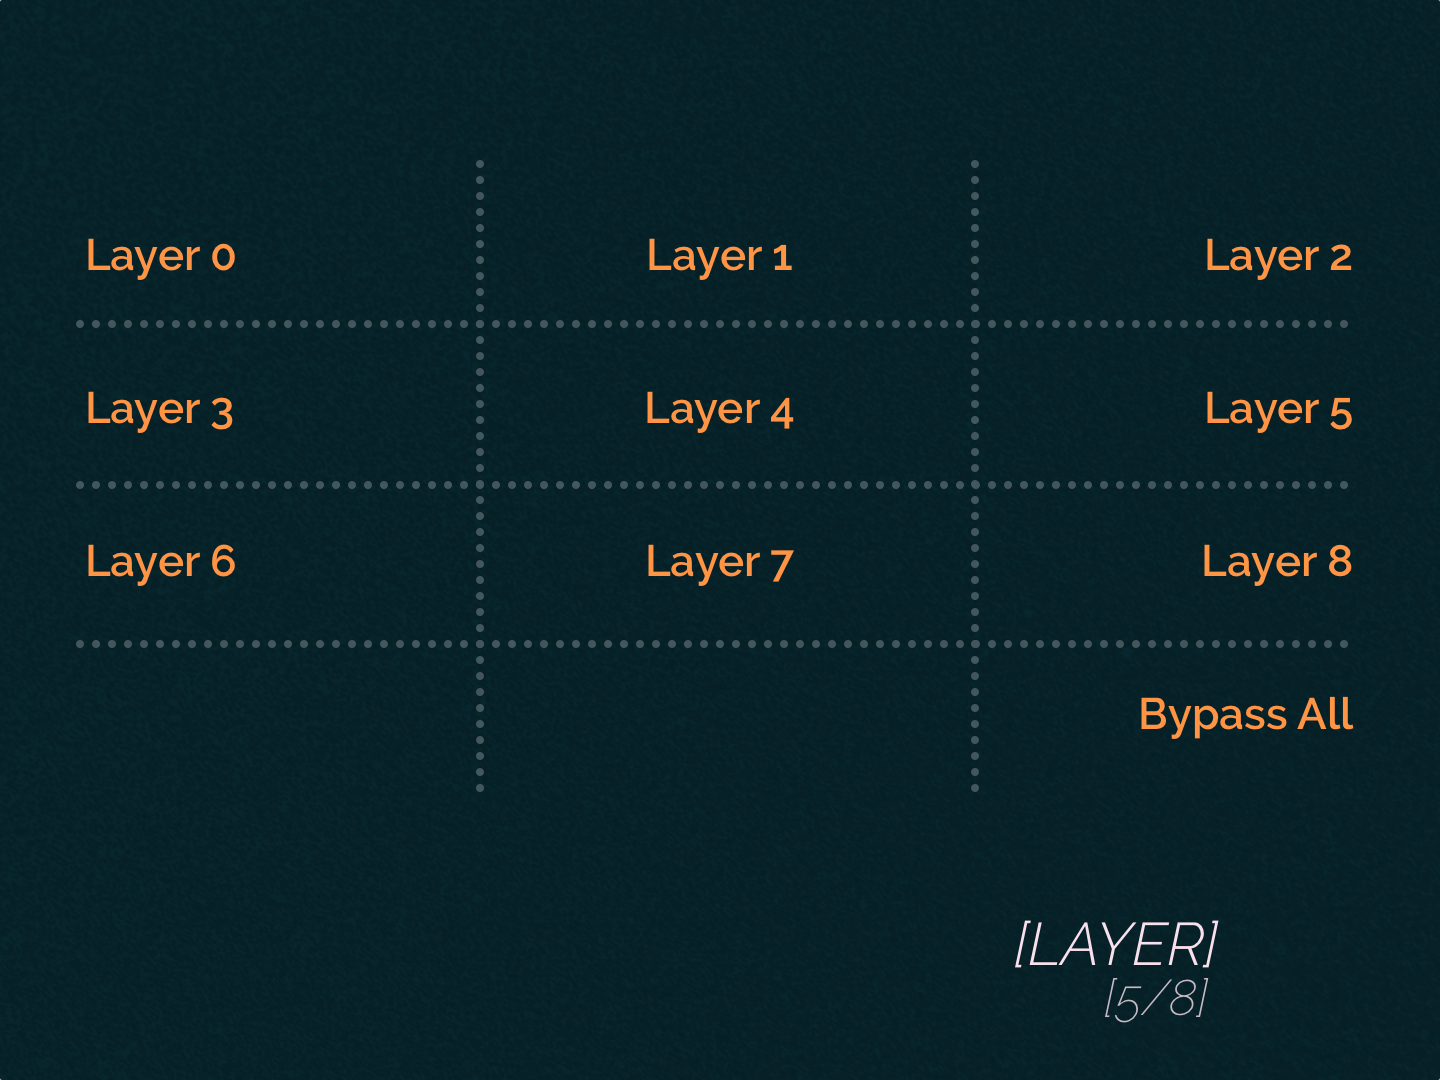
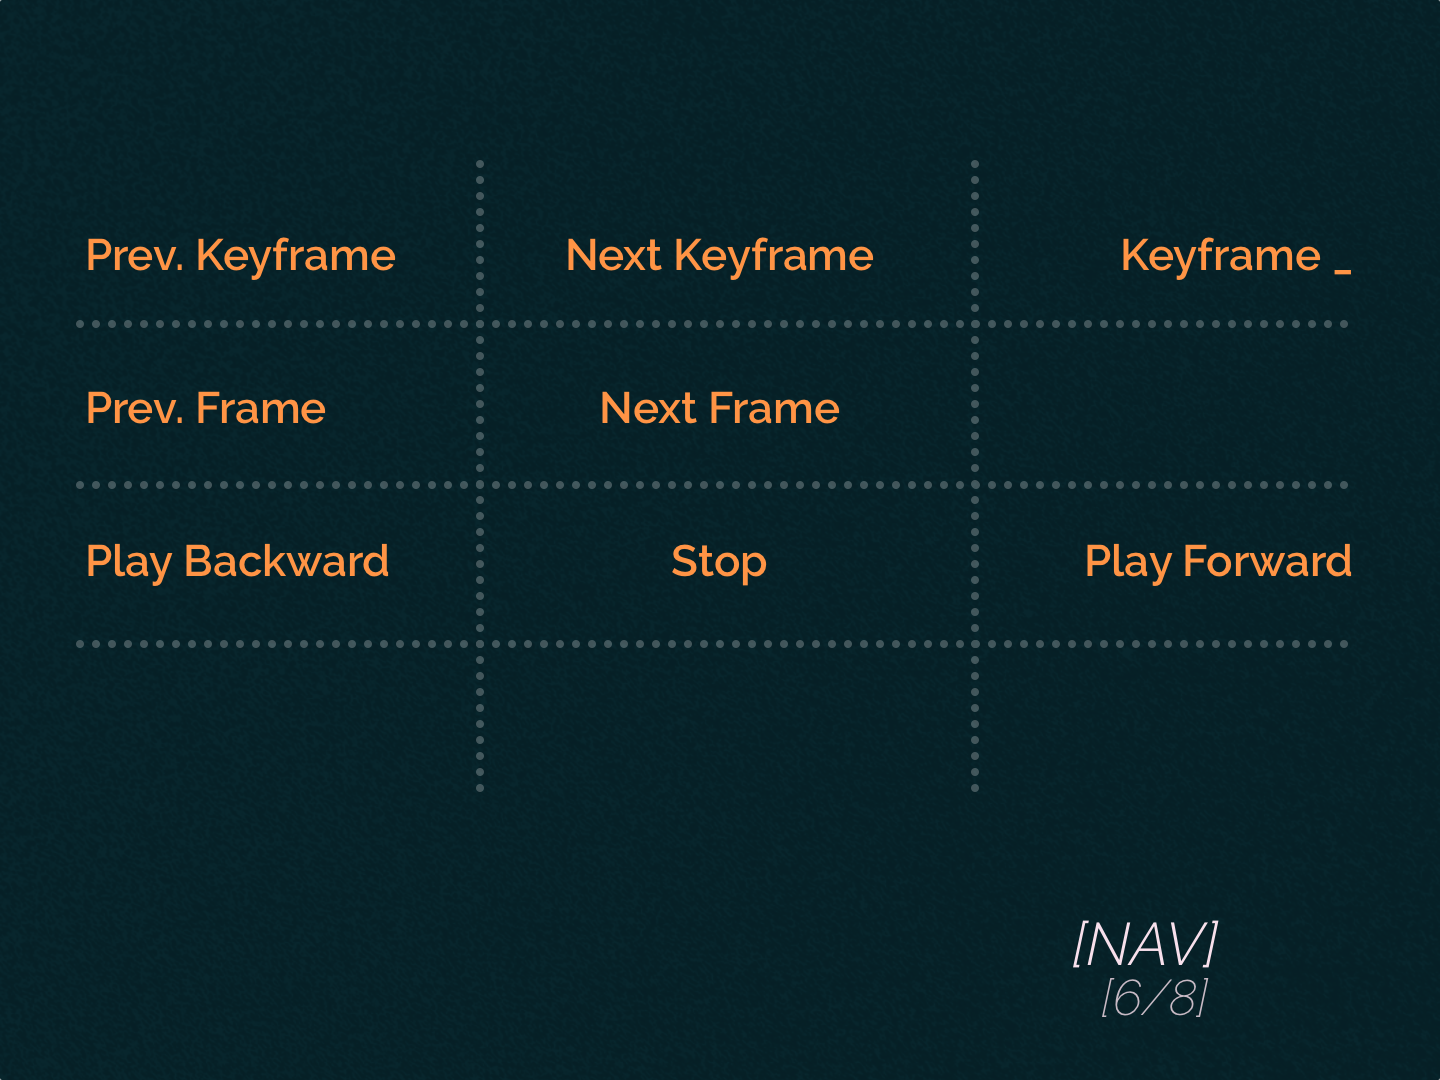
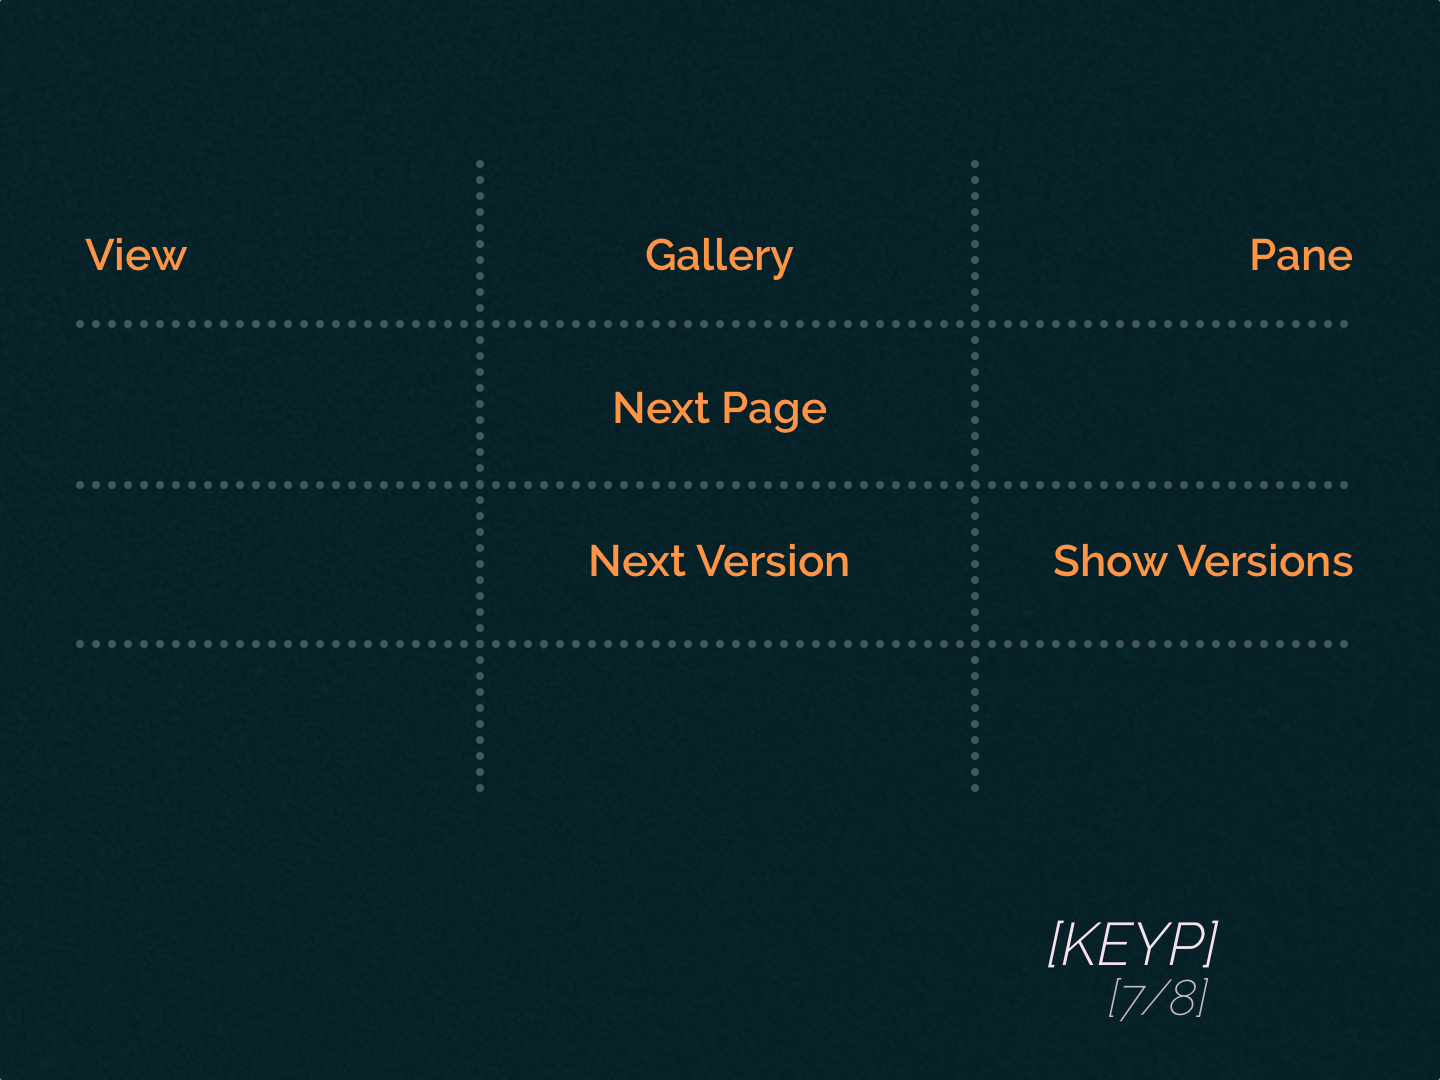
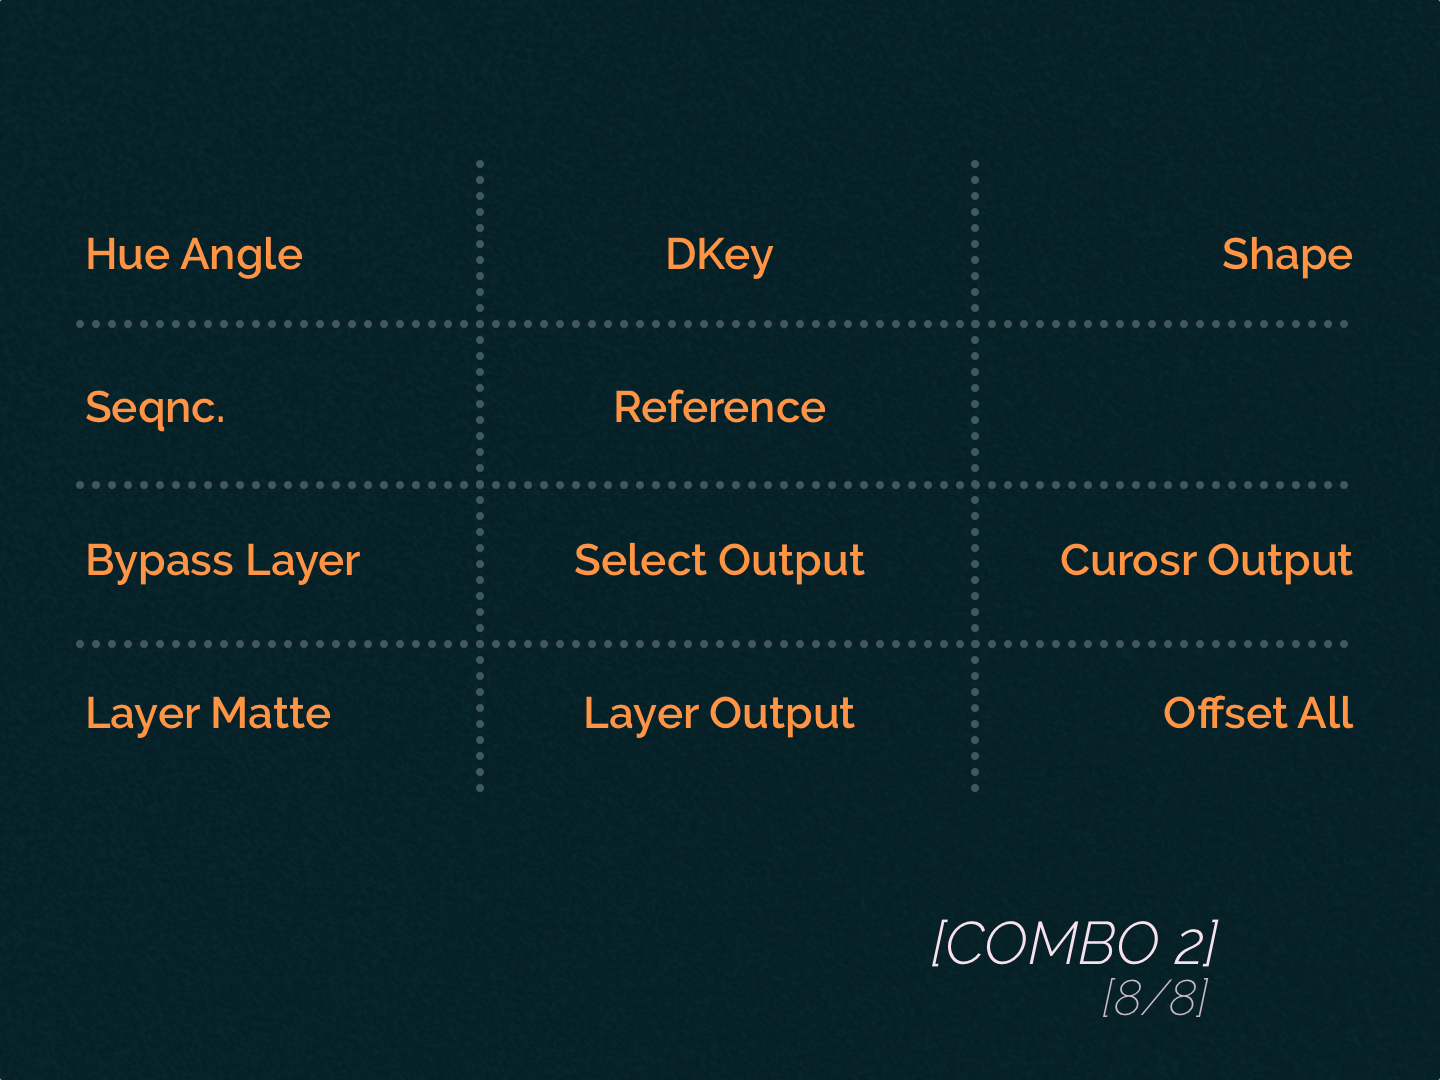
Buttons allow you to access commonly used tools, Operators, and functions, which are split into eight pages: General, DBS, Combo 1, Display, Layer, Navigation, Keypad, and Combo 2.
Some buttons are left blank, and a few operations can be found on more than one page. This is not ideal, but let’s not get discouraged.
All currently available actions are displayed on the panel. The screen estate is limited, and each option can be described in only 10 characters. For most operations, this is enough, but I had to investigate what some buttons do because the labeling wasn’t that clear.
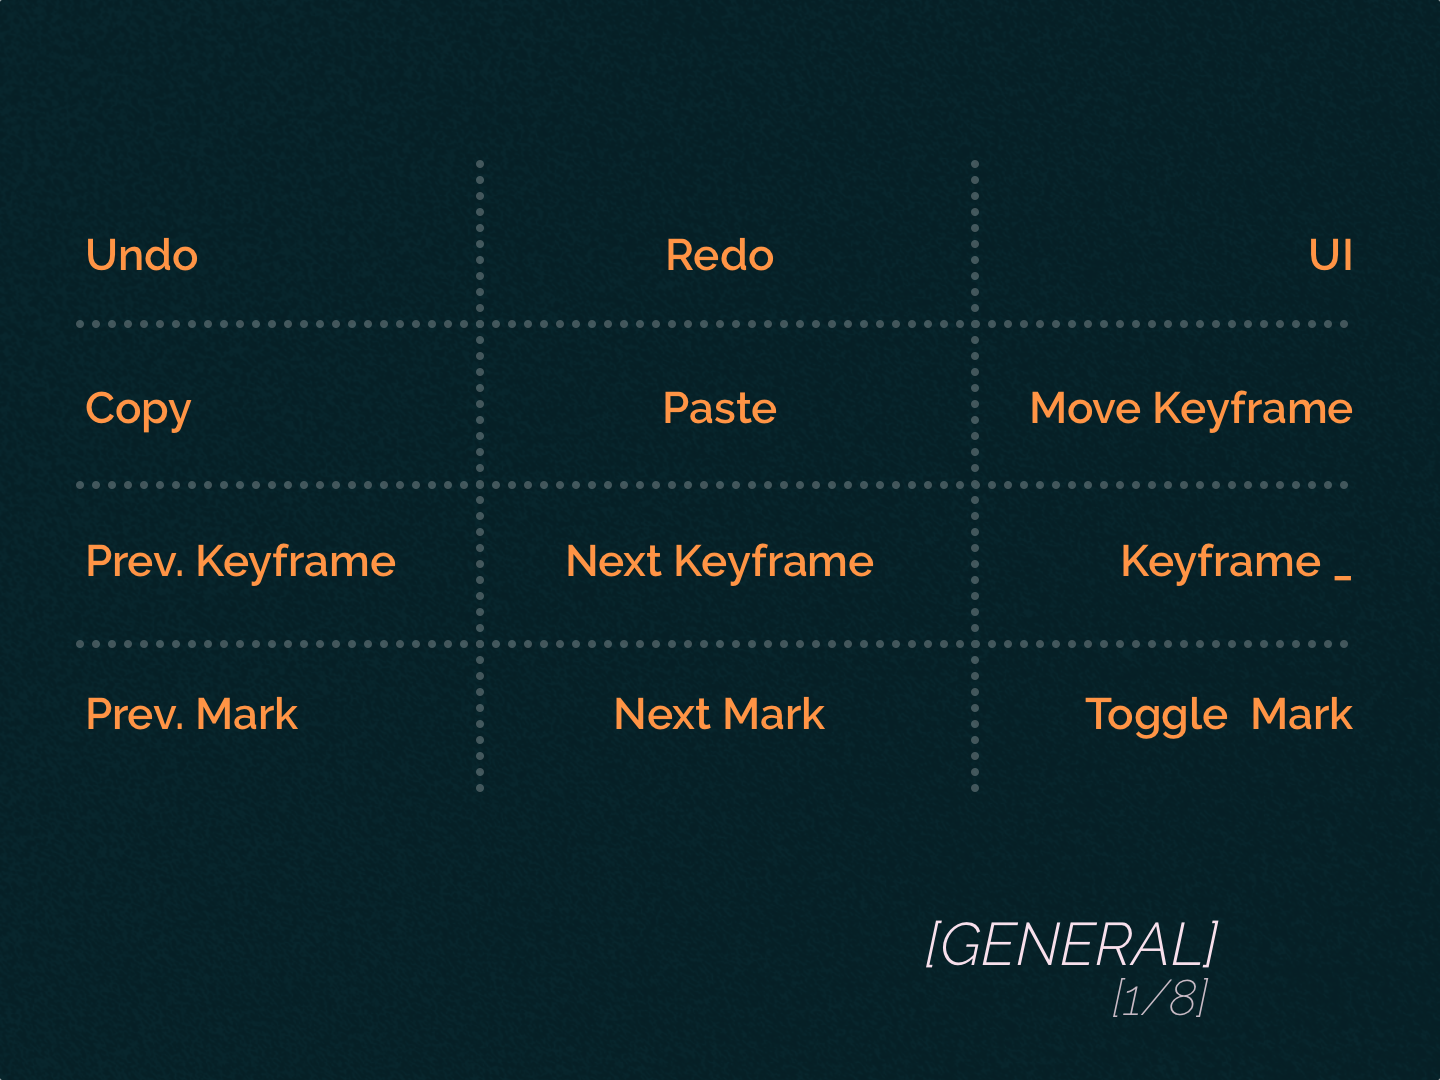
The A-button acts as a Shift key on a keyboard (giving you some alternative actions), and the B-button allows you to go to the next page. You can go to the previous page when you press and hold the A-button and tap the B-button.
My favourite page is DBS. I like that with one set of buttons, I can navigate through Gallery and Cuts View and have easy access to View, Try, and Apply functionality, which is unique to Baselight and highly useful. The Navigation page is not that beneficial if you have a full panel (or at least an Mf-Multifunction module). I also don’t see myself using the Keypad a lot.
Mf - Multifunction
The ring, which has the same function as a Shuttle Control on the Tangent Wave2 panel, works much smoother than its counterpart. Scrolling with it is enjoyable and reasonably precise.
The transport buttons are self-explanatory. The same rules apply here as in Wave2 when moving the cursor by one frame - you can do that by holding the Stop button and tapping Play or Reverse.
The best part about this module is that, by default, all the buttons are assigned as a Scratchpad, which is a handy tool for quickly saving and loading different versions of a grade, showing before/after for comparison, etc.
Kb - Knob
This module is a little disappointing. It could provide a very convenient way to manipulate parameters that are adjusted with sliders. Unfortunately, most sliders are controlled through trackballs, which are very sensitive and therefore inaccurate.
On top of that, knobs are active with only 10 Operators: Base Grade, CDL Grade, Curve Grade, Film Grade, Flare, Hue Shift, Six Vector, Technical Grade, Telecine Grade, and Video Grade.
Happily mapping for Base Grade (Flare, Contrast, Contrast Pivot, Saturation, Dim/Dark Pivot, Light/Bright Pivot) is perfect, and Curve Grade works with knobs like a charm.
Tk - Trackerball
This module is essential by itself, and offers a little extra on top.
No matter which Operator you are using at any moment, you can always hold the A-button and manipulate the Viewer - a middle ring lets you zoom in and out, and a middle trackball allows you to move the picture on the X and Y axes.
When you edit a Shape, you can change its size, aspect, and position by using three rings and trackballs.
Conclusion
With Tangent Element, you’re getting a lot of bang for your buck, especially if you buy this panel second-hand. After a few weeks of extensive use, I can appreciate the mapping - you are always only a few clicks away from (almost) every action or operation that you would like to perform.
If you’re not pulling the trigger on Slate or BB Classic, this panel (plus a Stream Deck or two) is your best alternative.